LED wall redundancy is best treated as failure-domain control, not a promise that nothing will ever go dark. In a command center, the real question is which failure can stay localized, which one can trigger a wider outage, and which parts of the system still need manual service. That lens helps you judge a mission-critical wall quote without reading too much into marketing language.
What Redundancy Means on a LED Wall
For LED wall redundancy, the starting point is simple: the architecture should reduce exposure to power, signal, controller, and service-access failures, but it should not be sold as a blanket uptime guarantee. Chipshow’s own redundancy overview frames the concept as layered protection across power, signal, and controller paths, which is the right mental model for buyers who need to separate design intent from outcome in every room layout and configuration.
That distinction matters because "redundant" can mean very different things on paper. A wall may still show a partial outage, a degraded section, or a content interruption even when one path is protected. The useful buyer question is not whether the system sounds resilient, but which failure mode it is meant to absorb without turning the whole wall into a full blackout.

A good rule of thumb is this: if the vendor cannot explain what happens when one feed, one cable run, or one controller path fails, the redundancy claim is too vague to approve. In mission-critical rooms, you want failure isolation first and a comfort word like "high reliability" second.
How Dual Power and Dual Signal Work
Dual power and dual signal solve different problems, and buyers should evaluate them separately. Power redundancy protects electrical continuity, while signal redundancy protects content delivery. When both are designed well, a single failure is less likely to take down the whole wall, but the visible result still depends on cabinet design, internal distribution, and how the system switches between paths.
A practical example of signal redundancy is a loopback signal path, which can let the system recover from the opposite direction if one cable fails. That does not mean every signal problem disappears. It means the display has a second route to keep content moving after one physical link is lost. In real rooms, that is often the difference between losing a source and losing the entire wall.
On the power side, buyers often hear N+1 language, but that term should stay a heuristic unless the exact documentation proves it. The useful question is not how elegant the label sounds. It is whether the quoted cabinet or power distribution design can keep the wall useful after a single feed failure, and whether the switch is automatic or service-driven.
What to verify before buying:
- Is the redundancy cabinet-level, row-level, or wall-level?
- Does the system fail over automatically, or does it need operator action?
- Are power and signal both redundant, or only one of them?
- What still becomes unavailable when one path fails?
- Does the quoted configuration match the family-level brochure, or a narrower build?
If the answer to the first two questions is unclear, the architecture is probably not mature enough for 24/7 command center use.
Failure Isolation Versus Full-Wall Downtime
Failure isolation is the part that changes a buyer’s risk calculation. A segmented LED wall can reduce the blast radius of a controller failure compared with a single large controller architecture, which means one fault may affect only part of the display instead of the entire visual surface. Hiperwall’s segmentation guidance is useful here because it shows how architecture can limit the impact of a controller problem.
| Failure Type | Typical Visible Impact | What Redundancy Can Help With |
|---|---|---|
| Module failure | A localized blank area, color shift, or a visible defect in one section | Limits the problem to a smaller area if the system is segmented or the module is serviceable |
| Cabinet or power-path failure | One section may go dark or enter a reduced-function state | Dual power paths can reduce the chance that one feed failure blackouts the entire wall |
| Signal-chain failure | A source loss, frozen content, or a partial image interruption | Dual signal paths or loopback routing can preserve delivery after one cable or path fails |
| Maintenance-related downtime | A planned service window or temporary interruption during repair | Front access, hot-swap design, and spare parts can shorten interruption |
The practical takeaway is that redundancy only matters if the wall can contain the damage. A wall that goes fully dark after one controller fault is less useful than a wall that keeps a smaller area live while the rest is serviced. That is why failure isolation is a more decision-useful phrase than broad reliability claims.
In procurement terms, ask the vendor to show the failure map, not just the feature list. If the answer describes only the happy path, the system may still be vulnerable to a single point of failure somewhere in the chain.
Hot-Swap Modules and Maintenance Planning
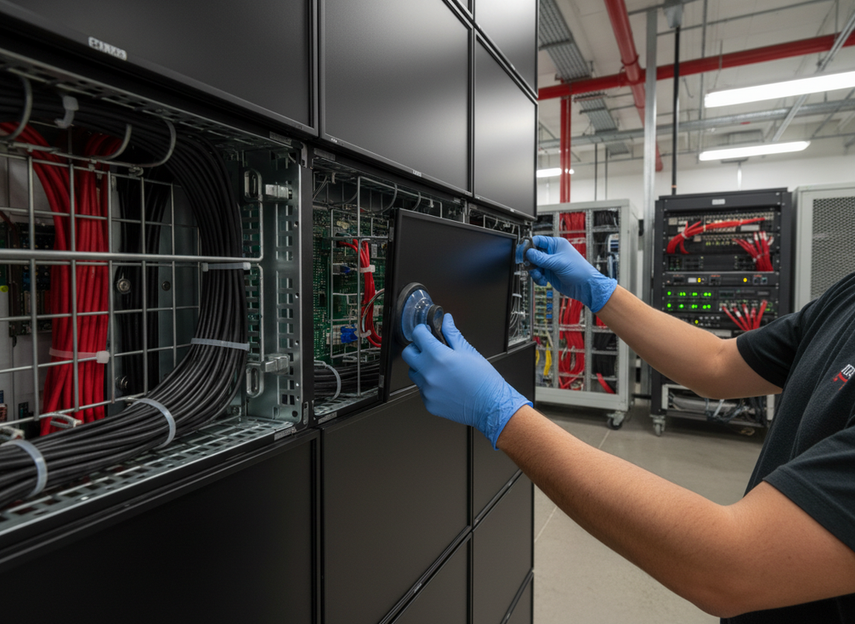
Hot-swap usually means a component can be replaced with less interruption, not that maintenance becomes invisible. For LED wall redundancy, that distinction matters. Removable parts can still require calibration sync, mapping recognition, or workflow steps before the wall looks right again, so "hot-swappable" should be read as a maintenance advantage, not a zero-interruption guarantee.
That is especially important in control rooms, where front access, spare-part availability, and the operator’s tolerance for interruption often matter as much as the hardware label. A module that is easy to pull but hard to re-sync can still create unexpected downtime. A better-maintained system is one where the service path is designed alongside the power and signal path.
The buyer checklist here is straightforward:
- Confirm which parts can be changed live.
- Ask whether replacement needs calibration or remapping.
- Check whether front-service access is available in the actual room layout.
- Clarify who stocks spares and how fast replacements arrive.
- Document the escalation steps for live operations.
If maintenance requires opening the wall, clearing the room, or taking a section offline for a long service cycle, the practical value of hot-swap is much lower than the brochure suggests. For that reason, hot-swap should always be judged alongside service access and spare-parts planning, not as a standalone feature.
How to Evaluate a Redundant LED Wall
Start with the use case, then move to failure modes, then service access, and finally the quoted documentation. AVIXA’s control-room bake-off and RFP guidance is useful here because it pushes buyers to verify resilience claims rather than accept family-level marketing language at face value.
Use this order when you compare options:
- Define what downtime actually costs in your room.
- Map the likely failures, including power, signal, controller, and module issues.
- Confirm whether the quoted system covers both power and signal, or only one.
- Test how much of the wall stays useful after a fault.
- Ask for the exact build, not just the product family name.
- Verify maintenance access, spare-part support, and the service workflow.
That sequence keeps you from overvaluing a single feature. A wall with dual signal but weak service access may still create operational pain. A wall with hot-swap modules but no real failure isolation can still go partially dark at the worst time.
If your room is mission-critical, review the exact quoted redundancy configuration, ask for the failover behavior in writing, and compare it against the actual room workflow before you approve the purchase. If the answer is still vague, keep shopping.
FAQs
How Does a Redundant LED Wall Handle a Power Feed Failure?
Usually, the wall should keep operating on the remaining path if the design truly has power redundancy, but the visible effect depends on cabinet layout and internal distribution. The key check is whether one failed feed creates a partial outage, a degraded section, or a full blackout in the quoted configuration.
What Is the Difference Between Dual Signal and Redundant Power?
Dual signal protects content delivery, while redundant power protects electrical continuity. They solve different failure modes, so one does not replace the other. If you only have one of them, ask what still becomes unavailable when the missing path fails.
Can Hot-Swap LED Modules Reduce Live Downtime?
Yes, but only if the swap is designed for live service and the workflow does not require a long recalibration or remapping step. The practical test is whether the room can stay operational while the replacement is made, not whether the module can be physically removed.
What Should I Ask a Vendor About Failure Isolation?
Ask which failure types stay local, which ones affect a wider section, and what happens if the controller path fails. Then ask for the exact build that matches your quote, because family-level brochures can hide important configuration differences.
How Do I Know If a 24/7 LED Wall Claim Is Realistic?
Treat it as realistic only when the vendor can show configuration-specific failover behavior, maintenance access, and a clear limit on what redundancy covers. If the claim cannot explain power, signal, and service continuity separately, the promise is too broad for a command center buying decision.