

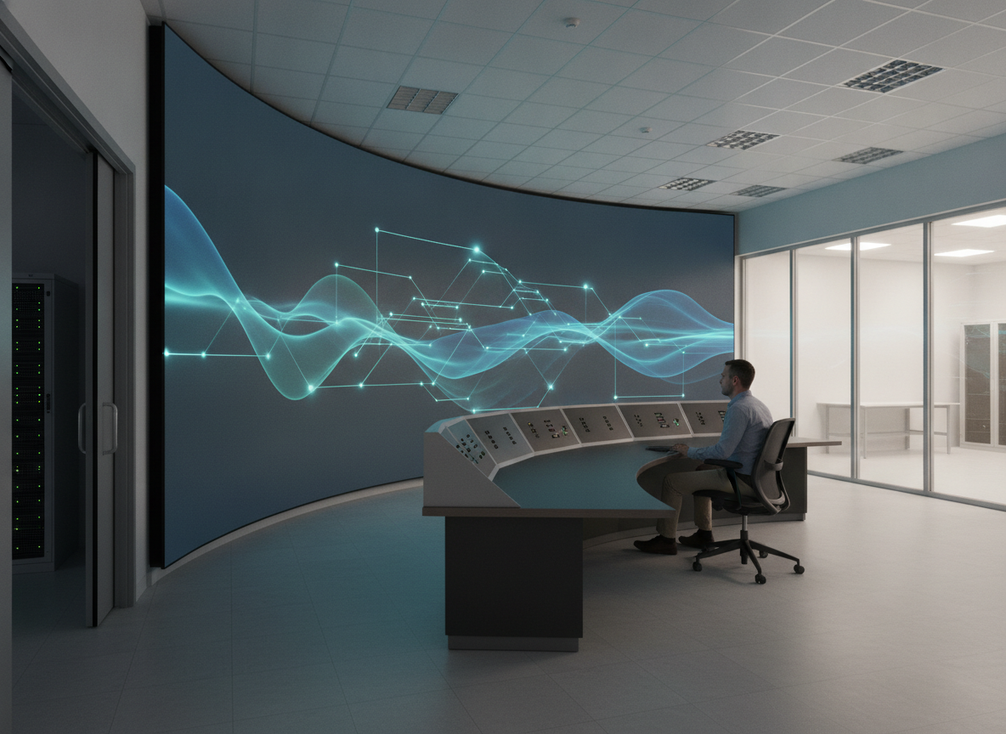
A command center LED wall should be specified from the room outward, not from a single spec sheet line. The right choice depends on viewer distance, operator count, ambient light, service access, and whether the wall supports 24/7 decision work. If you start with the mission and room geometry first, you are much less likely to overbuy on brightness or underbuy on readability.

Start With the Room, the Mission, and the Viewer Distance
Before you compare a command center LED wall spec checklist, define how the room is actually used. A control room that supports alarm response, shared oversight, and map-heavy decision work needs different display priorities than a room where people only glance at the wall occasionally. ISO 11064, the control-center ergonomics standard, is a good reminder that control-room ergonomics standards should support operator performance, not just look neat on paper.
Start with four checks: the room’s main mission, the closest normal viewing position, the number of simultaneous operators, and the ambient light pattern across day and night shifts. That gives you the decision layer you need before you talk about pixel pitch or brightness. If those basics are still moving, a detailed spec chase can turn into a false precision exercise.
For most buyers, this is also where the first shortlist filter happens. A wall that looks attractive in a demo may be a poor fit if the room forces close viewing, frequent shared reading, or long operator dwell time. If the room layout cannot yet be confirmed, keep the decision open and avoid locking into a display format too early.

You can also use a broad indoor category link as a navigation path while the room plan is still being finalized: browse indoor fixed LED options. If your project is already mission-critical and you want to compare a more focused category, the mission-critical command center wall page is a useful next stop for browsing, not proof of fit.
Core Specs Buyers Should Compare
The best command center LED wall specs checklist groups the sheet into a few decision buckets instead of treating every line as equal. Pixel pitch, brightness, cabinet geometry, and signal handling work together. If you only optimize one of them, the wall can still disappoint in daily use.
Pixel Pitch and Viewing Distance
Pixel pitch should be judged against the closest typical viewing position, not the room size alone. AVIXA’s viewing-distance pixel pitch guidance is a practical way to avoid buying too coarse a wall for dense map or dashboard work, or too fine a wall when the room will never be viewed up close.
The useful question is not, "What is the smallest pitch available?" It is, "What pitch supports the closest people who need to read the wall clearly?" In dense-data control rooms, that distinction matters more than a spec badge. Use the closest analytical viewing position as the anchor, then let the content detail and room layout do the rest of the work.
Brightness, Contrast, and Uniformity
Brightness matters, but brightness alone does not tell you whether a wall will stay readable across a full shift. Contrast and uniformity affect whether maps, alarms, and dashboards stay legible from edge to edge. In real procurement, that means you should check brightness alongside the room’s lighting, not in isolation.
For long shifts, the practical buying question is whether the wall remains easy to read without creating visual strain from glare, hotspots, or uneven panels. That is a usability check, not a medical one. If the wall looks impressive in a dark demo room but the control room has higher ambient light, the spec comparison should be reset to the actual room conditions.
Cabinet Format and Wall Geometry
Cabinet size and wall geometry affect more than aesthetics. They change seam visibility, aspect ratio, and how well the wall supports map layouts, multi-feed dashboards, or wide situation-awareness views. A geometry that looks efficient in a showroom may force awkward scaling once it lands in a real command room.
This is where buyers should match the display footprint to the most common content format, not the rarest one. If the room regularly shows multiple feeds, the wall should support that without turning key alerts into tiny window panes. Geometry also affects service planning, so it belongs in the spec review, not only in the install drawing.
Signal Processing and Input Handling
A command center LED wall should accept the room’s actual sources without creating unnecessary conversion steps. Signal routing, scaling, and processor behavior shape what operators see every day. If the room’s workflow depends on a mix of inputs, the wall should fit that workflow instead of forcing the team to build workarounds.
Open-standard AV-over-IP readiness is a useful background consideration for future interoperability, but it should not replace current workflow compatibility. In other words, check the sources you have today first, then ask what future expansion needs to be supported. If a platform only looks flexible on paper, it may still be awkward in the control room.
Front Service and Maintenance Access
Front service should be treated as a fit test against room constraints, not as a universal requirement. In a retrofit or a tightly built control room, rear access may be difficult or impossible. In that case, service method becomes part of the buying decision, because it affects maintenance windows, labor, and operational disruption.
- Define the access constraint first. Measure the room’s real clearance, the shutdown window, and the path technicians would need for module replacement or inspection.
- Verify the service method. Ask whether the wall is designed for front access, rear access, or a mixed approach, then check whether that method matches the room.
- Map the replacement workflow. The team should know how a module, power part, or signal part is swapped, who performs it, and how long the room is expected to be impacted.
- Confirm the spare-parts and downtime plan. Chipshow’s maintenance and spare-parts planning guidance is a useful budgeting reference, but buyers should use it as a planning heuristic, not as a universal rule.
When a vendor says service access is simple, ask for the exact workflow and the spare-parts assumption behind that claim. If the room cannot support the service method, the wall may still be a functional product, but it is a poor operational fit for 24/7 use.
Operator Comfort and Visual Ergonomics
For long shifts, operator comfort is really about readability, glare control, and endurance. ISO 11064 treats control-room ergonomics as a design issue, and that is the right mindset for a command center LED wall. The wall should support seated operators, shared viewing, and night-shift work without creating avoidable distractions.
The HSE’s 24/7 human factors guidance is a good reminder that control rooms need careful attention to how people actually work, not just how the room photographs.
Use a practical checklist:
- Check glare and reflections in the room’s real lighting, not only in a demo mode.
- Confirm the viewing angle for seated operators and shared sightlines.
- Watch for flicker or motion behavior that becomes distracting over long sessions.
- Compare color consistency across the full wall, not just the center panels.
- Judge comfort as a usability factor for long shifts, not as a health claim.
If the wall looks fine from one chair but becomes hard to read from the operator cluster, it is not really control-room ready. The comfort question is always tied to the room, the content, and the shift pattern.
Redundancy, Cabling, and Failover Expectations
Redundancy is worth asking for, but it should be verified as a fault behavior, not assumed to be a promise. Dual power and dual signal can improve resilience, yet they do not automatically guarantee uninterrupted operation. Buyers should ask what fails, what switches over, and what the operator sees when a fault occurs.
| Item To Verify | Why It Matters | What Evidence To Request | What Not To Assume |
|---|---|---|---|
| Dual power path | Helps reduce single-point failure risk | Written system diagram and power-path description | That the wall will keep running through every fault |
| Dual signal path | Supports alternate routing if a source or path fails | Signal-flow diagram and processor description | That any signal issue will be invisible to operators |
| Processor-side fallback | Clarifies how the wall behaves during a source or controller problem | Fault-behavior notes and recovery steps | Seamless failover without testing |
| Operator-visible behavior | Tells the team what they will actually see during a fault | Demo or written acceptance scenario | That redundancy is only a background feature |
| Acceptance proof | Turns a brochure claim into a procurement check | Written evidence and test records | That a marketing line is enough |
Chipshow’s mission-critical zero-downtime COB wall and mission-critical C-Pad line can be used as navigation points while you compare architecture options, but the buyer still needs the written fault path. If the backup path cannot be documented and tested, do not treat redundancy as an uptime guarantee.
Acceptance Criteria Before You Sign Off
The final acceptance step should confirm the wall in the room, with the room’s real content and lighting. Start with visual checks, then move to functional checks, then collect the paperwork that protects the procurement record. The point is to close the loop on what was promised, what was installed, and what the team will actually maintain.
Visual Performance Checks
Verify alignment, color consistency, and visible defects across the full display area. Do not rely on a showroom demo or a single bright image. If the wall has visible mismatch or obvious seams under normal content, that is a sign-off issue, not a minor cosmetic note.
Functional and Service Checks
Confirm input switching, monitoring, and service access under expected operating conditions. Then test the recovery path for common faults so the team does not discover a weak point during a live shift. If the maintenance workflow does not match the room’s staffing model or access window, treat that as an acceptance gap.
Documentation You Should Collect
Collect the written spec sheet, service procedure, installation notes, handoff records, and warranty terms before closing the project. Missing paperwork is not just an admin nuisance. It can make future troubleshooting, spares planning, and warranty support harder than they need to be.
If the wall passes the image check but fails the documentation check, the procurement decision is still incomplete. The safest next step is to shortlist, request revision, or pilot again before final acceptance.
Final Takeaway
A good command center LED wall checklist starts with room fit, then checks image clarity, service access, redundancy, comfort, and acceptance evidence. That order helps buyers avoid the most common mistake: buying a strong-looking spec sheet that is awkward to maintain or hard to operate in a 24/7 room. If you are building an RFQ, use the checklist above as your baseline, then ask vendors to show the fault path, service workflow, and handoff documents in writing.
FAQs
What Specs Matter Most for a Command Center LED Wall?
The highest-value specs are the ones that change daily use: pixel pitch for viewing distance, brightness and uniformity for readability, cabinet geometry for room fit, service access for maintenance, and redundancy for fault behavior. If a spec does not affect room fit, operator clarity, or handoff risk, it is usually lower priority.
How Do Buyers Confirm Front-Service Access?
Ask for the service method in drawings or cut sheets, then verify how a module, power part, or signal part is actually replaced. The key question is whether the room has enough clearance and the right maintenance window for that method. If the answer is vague, the service plan is not ready for sign-off.
Do Command Centers Need Dual Power and Dual Signal?
Often they should at least be considered, but the real question is what the system does during a fault. Dual paths can improve resilience, yet they do not guarantee zero downtime. Buyers should ask for a written fault-path description and test the expected operator-visible behavior before accepting the claim.
What Pixel Pitch Is Best for a Control Room?
The right pitch depends on the closest normal viewing position and the detail level of the content. A wall used for dense maps or data dashboards usually needs tighter scrutiny than one viewed from farther away. The safest approach is to use viewing distance and content detail as the decision rule, not the pitch number by itself.
Can Buyers Use One Checklist for New Builds and Retrofits?
Yes, but retrofits usually put more weight on access constraints, cabling routes, and maintenance windows. New builds give you more freedom on geometry and layout, while retrofits often force trade-offs. The same checklist works for both, but the room constraint section usually becomes more important in an existing control room.