

A pillar article on a command center LED wall should start with ownership risk, not pixel specs. In a 24/7 control room, the right wall has to stay readable, support fast recovery, and fit maintenance and operator workflows. That is why a pillar article should be judged on redundancy, service access, ergonomics, and lifecycle cost, not just image sharpness.
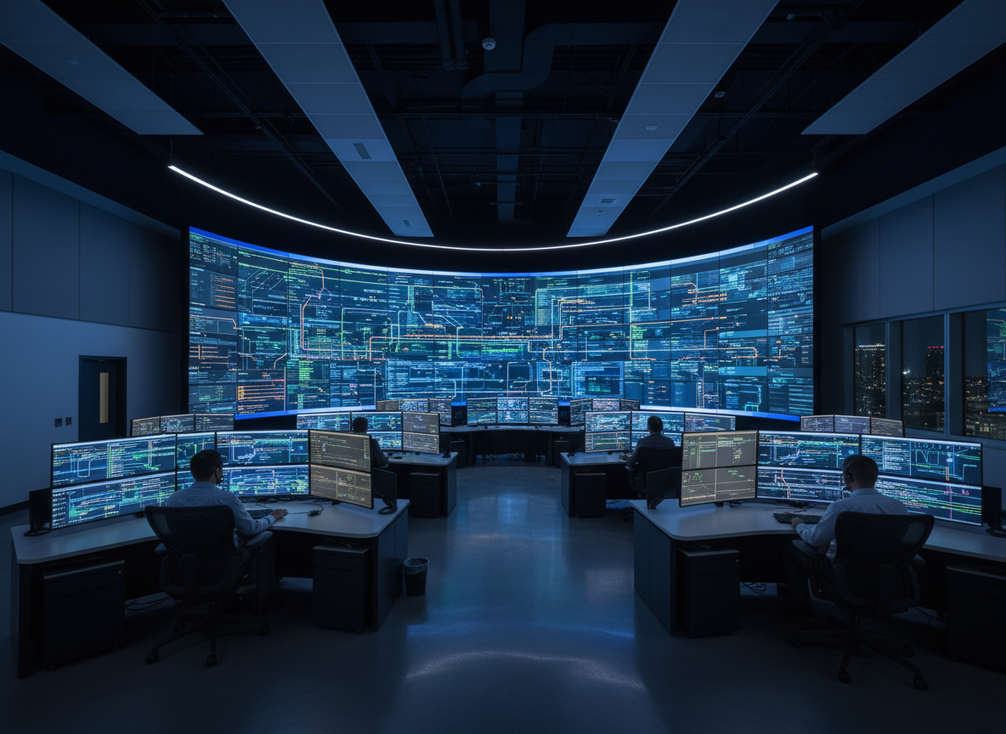
What a Command Center LED Wall Must Do
A mission-critical wall is there to support daily decisions under pressure. The question is not only whether the image looks sharp in a demo room, but whether operators can trust it during long shifts, fault conditions, and maintenance windows. That is the core reason control-room buying should follow control-room ergonomics and human factors rather than generic indoor display instincts.
For most buyers, that means separating command center requirements from meeting-room or signage logic. If the room runs around the clock, the wall needs to support situational awareness, minimize avoidable disruption, and stay serviceable when something does go wrong. A practical rule is simple: if a spec does not change operator uptime, visibility, or recoverability, it is probably not your first decision factor.
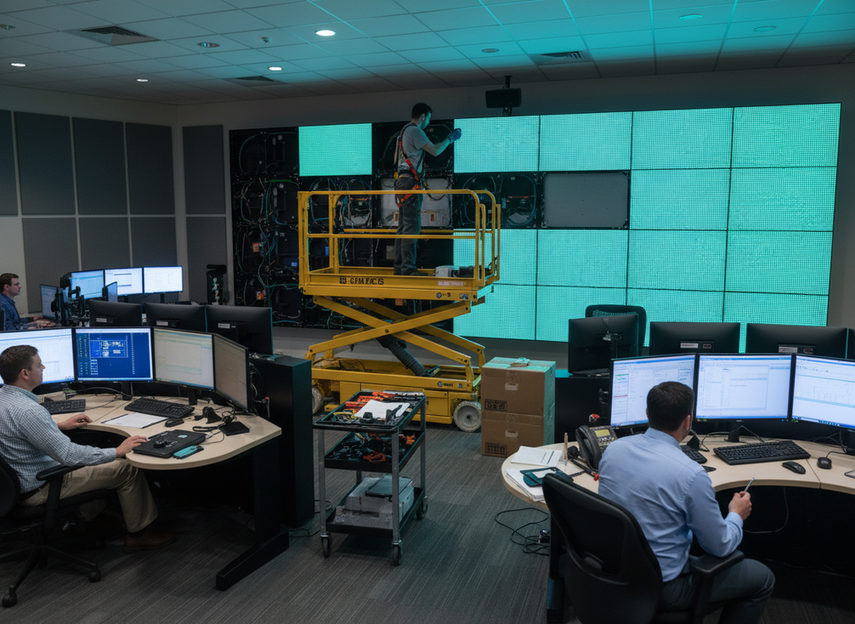
Compare the Core Technology Choices
The best platform is the one that matches the room’s operating risk. Some buyers need a rugged mission-critical path, while others only need a versatile indoor platform with strong image quality and broader category fit. The decision is less about which is "better" in the abstract and more about which one fits the room’s support model.
| Decision Factor | Why It Matters In A Command Center | What To Check Before Buying | Where Mission-Critical Designs Help | What To Confirm In Documentation |
|---|---|---|---|---|
| Image consistency | Operators need stable readability across tiles and over time | Uniformity, calibration approach, and expected viewing conditions | Helps when the wall is used for maps, alarms, and camera feeds | Ask how consistency is maintained after service or module replacement |
| Protection approach | Control rooms often run longer and face more handling risk | Front protection, cabinet robustness, and cleaning workflow | Can reduce exposure to routine wear in busy rooms | Verify the actual protection details, not just the marketing phrase |
| Service access | Maintenance should not force a room reset | Front access, rear access, spare swap path, and room clearance | Can shorten intervention time in tight rooms | Confirm how modules, controllers, and power parts are replaced |
| Operating fit | Some rooms need 24/7 support; others do not | Shift pattern, uptime expectation, and escalation path | Better aligned with mission-critical operations | Ask whether the vendor documents the exact support model |
| Documentation confidence | Unclear claims create procurement risk | Manuals, diagrams, support terms, and compatibility notes | Helps reduce surprises at handoff | Shortlist only after the documents match the room’s use case |
If you are comparing Chipshow families, use the mission-critical LED wall options when the room needs a stronger ownership model, and use general indoor LED options when the operating risk is lower and the room is not built around nonstop uptime. The key is not the label itself, but whether the support and access model matches the actual control-room workload.
Build Uptime and Redundancy Into the Plan
In a control room, uptime should be treated as a design objective, not a casual promise. The practical question is whether the system can keep operating, or recover quickly, if one path fails. CTI’s guidance on power, signal, and controller redundancy is useful here because it frames redundancy as a system-level issue, not a single feature.
A good buyer checklist asks three things. First, how is power protected? Second, how is signal continuity handled if a source, cable, or controller path fails? Third, what happens when the room needs service during active operations? If the answer is vague, the risk is not just downtime. It is also confusion during recovery, which is often the more expensive problem.
The safest way to think about this is: redundancy should cover the paths that would actually stop the wall from serving operators. That usually includes power, signal, and control logic. If a vendor only talks about one layer, keep pressing until the full chain is documented.
Redundancy Paths to Ask About
Ask how the wall behaves when a power path, signal path, or controller path fails. If the system relies on one hidden dependency, that is a single point of failure even if the spec sheet sounds robust. For mission-critical rooms, the right answer is usually specific, not generic.
Signal Continuity Checks
Source switching and controller recovery matter because operators often notice display failures after the fact. A wall can look impressive and still create risk if source handoff is slow or unclear. Ask whether the room can tolerate a brief interruption, or whether the workflow needs continuous display behavior during a fault.
Service Windows and Recovery Planning
Zero downtime should be treated as a design goal unless product documentation proves otherwise. That is the cleanest way to avoid turning a sales phrase into an operational guarantee. If the room cannot pause easily, make sure the recovery process includes access, spare parts, and response timing before you shortlist anything.
Design for Serviceability and Fast Access
Serviceability affects ownership cost long before the first part fails. A wall that is easy to maintain usually has better access paths, clearer swap steps, and fewer room disruptions when parts need replacement. That matters because command center maintenance is rarely just a technical task. It is also a scheduling and coordination problem.
Here are the checks that matter most:
- Can technicians reach the modules without rearranging the room?
- Can front-service or rear-service access happen within the available clearance?
- Are spare modules, controllers, and power parts easy to store and swap?
- Does maintenance force operators to leave their positions?
- Is diagnosis straightforward, or does the team need to dismantle the room to find the fault?
The buyer takeaway is simple: if maintenance creates a major room disruption, the wall becomes more expensive to own even when the upfront price looks acceptable. For long-life control rooms, operate-phase ownership planning is a better lens than install-day convenience.
A front-service LED display can help as a navigation example, but only if the access model fits the room. The real question is whether the physical access path fits the room, not whether the product sounds premium.
Protect Operator Comfort and Readability
Ergonomics is not a soft benefit in a 24/7 control room. It affects how long operators can stay attentive, how easily they scan data, and how quickly they respond when something changes. ISO 11064 gives the control-room-specific frame for those decisions, while AVIXA’s viewing distance and display size guidance helps tie screen size and placement to content detail.
For practical buying, focus on three questions. Can the team read the content comfortably from typical positions? Does the wall stay legible across day and night shifts? And does the setup reduce glare, neck strain, or repeated head movement?
Viewing Distance and Layout
Start with where people actually stand or sit, then work backward to screen size and pixel density. If the wall is too small for the room, operators will struggle to absorb detail. If it is too large or too close, they may lose the comfort needed for longer monitoring sessions. The point of ergonomic control room design is not just comfort. It is readable, usable situational awareness.
Brightness and Glare Control
Brightness should be balanced, not maximized. In real rooms, overly aggressive brightness can feel harsh during long shifts, while too little brightness can make critical information hard to read. Check for reflections from glass, glossy surfaces, and nearby light sources, especially if the room runs day and night.
Color Consistency and Readability
Color consistency matters when the wall carries camera feeds, maps, alarms, and text at the same time. Uneven cabinets or drifting color can slow interpretation, even if the wall looks fine from a distance. A strong command center LED wall buying guide should therefore treat readability as an operational requirement, not a cosmetic preference.
Estimate Ownership Cost Across the Full Lifecycle
The purchase price is only the first line item. Installation complexity, access constraints, spare-part strategy, downtime exposure, and support terms all change what the wall really costs to own. For that reason, lifecycle cost should be treated as scenario-based planning rather than a universal number.
| Cost Element | What Drives It | What Buyers Should Request | Ownership Risk If Ignored | How To Estimate It During Procurement |
|---|---|---|---|---|
| Installation | Room access, rigging, mounting, and site prep | A site-specific install scope | Budget overruns and delayed go-live | Map access, power, and structural constraints early |
| Service access | Front or rear access, clearance, and room layout | Service drawings and swap workflow | Higher labor cost and more disruption | Ask how a failed module is replaced in the actual room |
| Downtime exposure | How expensive interruption is for the operation | Recovery plan and fault escalation steps | Operational loss when the wall is unavailable | Estimate the value of one interruption window |
| Spare parts | Module, controller, and power component strategy | Spare list and stocking responsibility | Slow recovery if a part is unavailable | Match the spare plan to expected service intervals |
| Support terms | Warranty, response time, and labor coverage | Written support scope | Surprises after installation | Compare support language side by side before purchase |
For a long-running room, the best lifecycle question is not "What is the cheapest wall?" It is "Which option creates the least ownership friction over time?" That is where operate-phase ownership planning becomes useful, because the operating phase is where many hidden costs show up.
Use the Command Center solutions page as a navigation starting point if you want to compare a broader mission-critical path. Treat it as a place to confirm whether the support model, access model, and room expectations are worth a deeper review.
Use the Buyer Checklist to Narrow Your Shortlist
Before you shortlist a command center LED wall, verify the room, the support plan, and the recovery model. A good procurement process is less about finding the flashiest spec sheet and more about removing avoidable ownership risk.
- Define the room’s operating pattern, including 24/7 use, shift changes, and acceptable interruption windows.
- Confirm the viewing positions, content types, and readability needs for operators.
- Ask how redundancy is handled across power, signal, and controllers.
- Check the service access path and whether the room can absorb maintenance without a major disruption.
- Review the spare parts plan and who is responsible for stocking them.
- Verify the warranty and support terms in writing.
- Compare lifecycle cost assumptions, not just the initial invoice.
- Shortlist only the options whose documentation matches the room’s actual risk profile.
That is the practical filter for a command center LED wall buying guide: if the wall cannot support recovery, service, and readability in your room, it is not a fit no matter how strong the spec sheet looks. If you are narrowing options now, compare the mission-critical product family against your room’s support needs, then verify the access and redundancy details before you commit.
FAQs
How Do You Choose the Right LED Wall for a 24/7 Command Center?
Start with the operating risk, not the resolution. The right choice balances readability, uptime planning, service access, and operator comfort. If the room cannot tolerate interruption or difficult maintenance, the wall needs a stronger ownership model than a generic indoor display.
What Redundancy Questions Should Buyers Ask Before Purchase?
Ask how power, signal, and controller paths are protected, what happens if one path fails, and how quickly the system can recover. The best answers are specific to the room’s workflow. If the vendor only describes one layer of protection, the redundancy plan is probably incomplete.
Why Does Serviceability Matter in a Control Room LED Wall?
Serviceability affects disruption, staffing, and recovery time. Front access, spare-part handling, and clear swap steps all reduce the cost of maintenance over time. If service requires major room rework, the wall can become harder to own even if the image quality is strong.
Can a Mission-Critical LED Wall Reduce Ownership Risk?
It can reduce some operational risk when the room’s redundancy, access, and support requirements are matched correctly. It is not a substitute for a full support plan, and it should not be treated as a guarantee of zero downtime. The fit depends on the room’s actual operating conditions.
What Drives Lifecycle Cost Beyond the Initial Purchase Price?
Installation, access constraints, spare parts, support terms, and downtime exposure usually shape lifecycle cost more than the headline invoice. The cleanest comparison is scenario-based: compare what each option costs to install, maintain, and recover over time, not just what it costs to buy.